Working in the Round: Adding Yarn and RetP
Making a Magic Ring┃Part 2: Adding Yarn & RetP
TUTORIALS
Making a Magic Ring┃Part 2: Adding Yarn & RetP
This is the second video in a series of tutorials that will help you learn the fundamental stitches needed to make projects in the round and the methods I use in my patterns.
In this post I will show you how to work in Tunisian Crochet in the round (TITR) using the magic ring method.
You will learn how to attach a second colour yarn and perform the Return Pass.
In Part 1 we covered the equipment you will need and creating the magic ring and casting on.

Looking for unique patterns to try out your new skills? Check out my collections on these platforms:
Happy crocheting!
For more tips and patterns, follow us on Pinterest and visit our blog regularly. Stay tuned for more ‘No Float Colourwork’ creative ideas from Rosehip & Hawthorn by subscribing to our newsletter.
#TunisianCrochet #MagicRing #CrochetTutorial #RosehipandHawthorn #Magiccircle #NoFloatColourwork
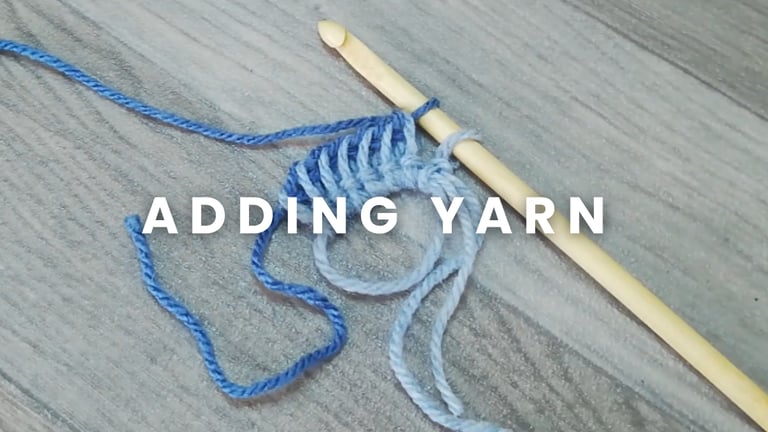
Slide the circle to the other end of your hook and turn your work so the back of your work is facing you
Make a slip knot in a contrasting yarn and attach it to your hook
Pull the slip knot through the first loop
Then yarn over and pull through 2 loops
Repeat this until you have two loops left on your hook, one of each yarn colour
Slide your work to the other end of your hook and turn your work to the right side
Tighten the circle
You are now ready to move on to Part 3